

Are you in the mood for Christmas yet? Our wonderful Cathy has challenged us to come up with an "Anything but a card" project for this weeks challenge at Mo's Digital Pencil. I've seen several of these Christmas planners created from a plain old manila file folder and decided to try it out.
For the cover I've used the adorable "Little Elf Kit". All my papers are from an older K & Company Christmas pad.
When folded the planner has four nice pockets for holding your Christmas to dos. I've added some printable lists that can be found here.

The last pocket hold a handmade envelope for keeping track of receipts or coupons.

I added some velcro to my ribbon for the closure.

Here is a pictorial tute on how to construct the planner.

1. You need one manila folder. To have the tabs in the position shown on my planner you need to use a folder with the left hand tab.

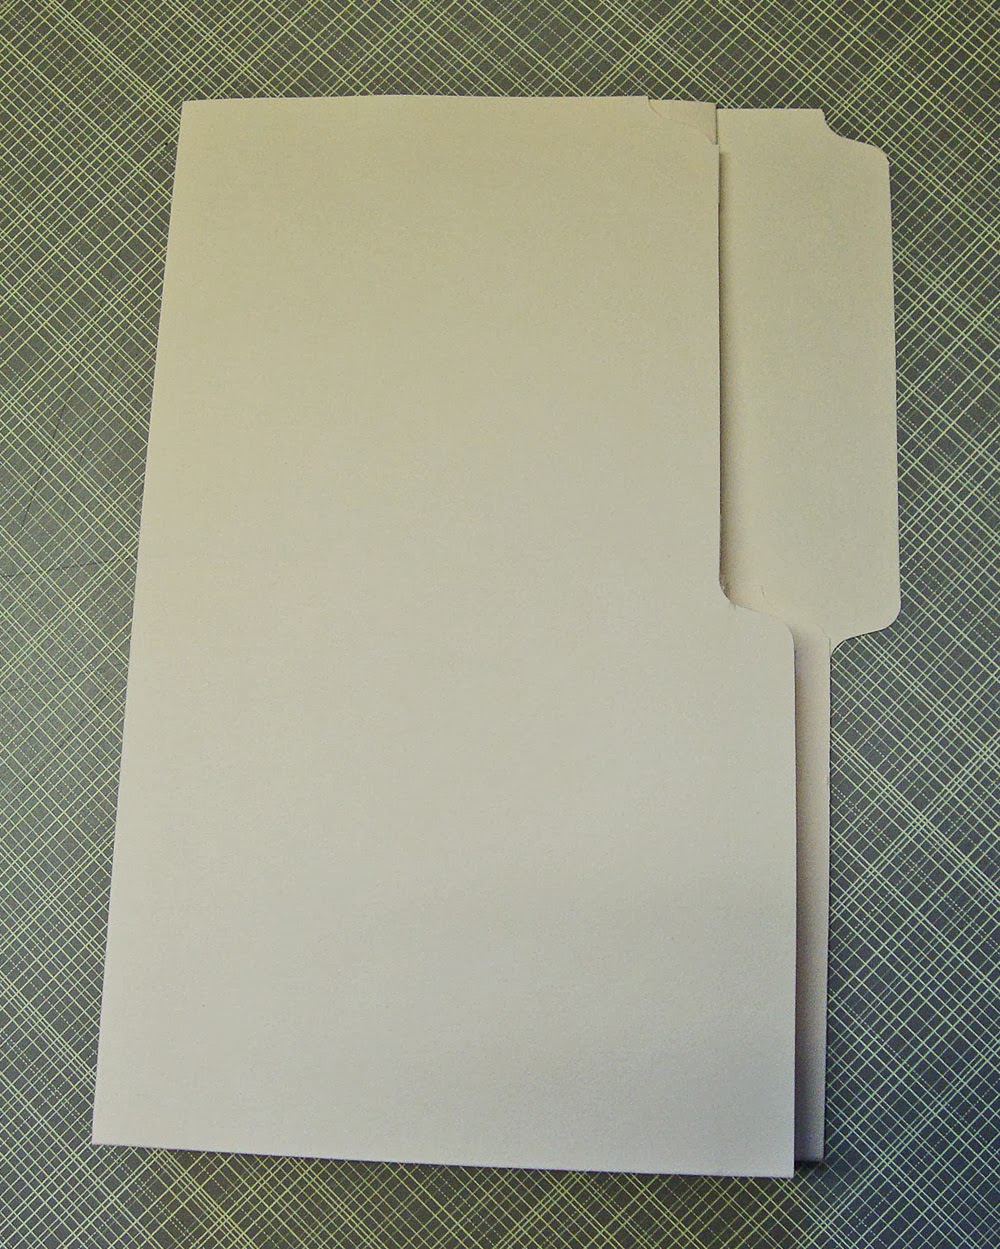
2. Open the folder with the tab in the upper right hand corner. Fold the bottom of the folder up until the rounded corners meet on the left hand side. Use a bone folder to smooth all your folds. The photo below shows what this should look like on the left hand side.


3. Turn the folder ninety degrees and fold that same left hand edge up until the flat line (NOT the tab) of the folder is aligned with the natural center fold of the folder. Your folder should now look like this.


4. Flip your folder over to the back side.

5. Line up the folded edge on your scoring board and score along the crease for the last page of the planner. Flip your folder back over and use your bone folder to smooth this last fold into place.


I'd like to enter my card into the following challenges:
Crimbo Crackers--Anything but a card
Delightful Challenges--Anything but a card
Little Red Wagon--accordion fold
Make It Monday--anything goes
Hope you have a great rest of the week!

Supplies:
Paper--K & Company "Yuletide", Tim Holtz grunge board, Pendaflex manila file folder, Copic XPress-it Blending card
Stamps--Mo's Digital Pencil "Little Elf Kit", sentiment from Hero Arts
Ink-Vintage Photo and Walnut Stain Distress inks, Versamark, Memento Rich Cocoa, Micron Sepia pen
Copics Used:
skin--E000, E00, E11, E13, R20, R30
hair--E21, E23, E27
clothing--C00, C0, C4, YG03, YG93, YG95, YG97, R27, R29, R59
star--Y28
Tools--Bow Easy, Tim Holtz Tiny Attacher, Memory Box Jingle Bell dieMiscellaneous--Stampendous Gold embossing powder, Celebrate It ribbon, Gold Stickles, glitter from my stash, Velcro
Oh, this is wonderful!
ReplyDeleteLove the gorgeous papers, colors and the image is awesome!
And such a good idea with a planner :)
Hugs, Maya
Oh my Tracy, this is beautiful.
ReplyDeleteLove the papers and embellishments you used along with the image. And thanks for the tutorial. Hugs,
Wow, love this project! Great tutorial from you and the finished result is just stunning! Fabulous work yet again :)
ReplyDeleteGreat tutorial. I'm going to TRY to make one. And yours is adorable with the cute Mo's elf and all the beautiful papers!
ReplyDeleteBrilliant project, Tracy! Love the planner you created! The papers are gorgeous and Mo's little elf is the cutest! Fantastic design! Thanks for sharing how you did it!
ReplyDeleteWow Tracy, this is stunning - looks wonderful, and so useful too, Jo x
ReplyDeleteWhat a fabulous project! I love how it turned out.. everything about it!!! Thank you for adding the tutorial pics...I would love to try this..xxx Ann Marie
ReplyDeleteWow, I love this, Tracy! Great papers and coloring...
ReplyDeleteAnd i wanted to thank you, since this little project of yours inspired me for some Mo's Xmas cards I've struggled for couple of days, so - Thank You! :)
Have an awesome day...
Wow this is beautiful Tracy and fabulous tutorial,thanks for sharing!!
ReplyDeleteXXX Heidy
I could really need a Christmas planner! This is a great idea for a gift, I know I would have appreciated receiving one. This one is so beautifully decorated. Perfectly sparkly and love your doodling too!
ReplyDeleteWhat a beautiful...and practical...project! I love the adorable image too! :o)
ReplyDeleteThis is Wonderful Tracy, what a great idea and clear tutorial too. Like the papers you chose and the little Christmas elf was a perfect choice.
ReplyDeleteHuge Hugs Mau xx
I am over the moon in love with this! And it only took one folder, I thought it would be a couple for sure. Absolutely probably hopefully gonna make one of these! Wonderful job on the elf too, your glittery star and reds look fabulous!
ReplyDeleteTracy, love the notebook and the tutorial, you are my hero :) You always rock the anything but a card projects and your details are always so awesome. Thanks for creating such an awesome project and showing us how to make one too, for the challenge :)
ReplyDeleteThis is wonderful Tracy, such a fabulous design. I love the adorable image and gorgeous papers.
ReplyDeleteThank you for such a great tutorial, I will be adding this to my list of things to make.
hugs Sue xx
Wow Tracy I love your Christmas planner!! A fantastic idea and beautiful made. The papers you used are lovely and the Mo image is so cute. Thank you for the tutorial! hugs, Marlies
ReplyDeleteWhat a fabulous Christmas planner.
ReplyDeleteluv
Debby
Wow Tracy, this absolutely GORGEOUS!! Thanks for the tutorial, I am definitely going to try it. Hugs, Ivonne
ReplyDeleteOMGosh, brilliant! And sooo beautiful!
ReplyDeleteAwesome Tracy! Thanks so much for the tutorial. Yours is just beautiful. Hugz, joann
ReplyDeleteEeeeeep!!! Why didn't this lovely project come up in my feed yesterday....?!!
ReplyDeleteOh that's right... I had my 2 little ones @ the doctor ... Again... :( Boo! :(
On the brighter side --- your Manila folder planner is fantabulous !!!!!
Great awesome clear tute & super yummy end result !!! Your planner is stellar!! Thanks for sharing !! Xo
Ps -- I used a jingle bell die on my card for tomorrow, too!! ;))
DeleteThis is so gorgeous. Beautiful design and awesome layout. I spotted you over on Make it Monday and popped over for a closer look. I am so glad that I did.
ReplyDeleteHugs
Cathy
xxxxx
Love it!! What a fabulous planner and that little elf is too cute!
ReplyDeleteThis is so wonderful! So very beautiful as well! Thanks for sharing it with us at Delightful Challenges! :)
ReplyDeletegreat Xmas planning booklet - thx for the tutorial
ReplyDeleteSuper cute planner. Love the image so festive. Thanks for joining our Anything But a Card Challenge Delightful Challenges.
ReplyDelete~~Chris
Beautiful planner, love the gorgeous image on the front and all the fab bits and pieces on the inside.
ReplyDeleteThanks for sharing with us at Make It Monday this week.
Hugs,
Sandy
Gorgeous Tracy! What a fabulous creation. I saw this on MIM and had to see what it was. Fantastic creativity!
ReplyDeletePlease join me for a chance to win FREE candy on my blog if you haven’t already joined. Have a wonderful week! Hugs, Gloria
http://purpleglocreations.blogspot.com
Wow absolutely stunning!
ReplyDeleteBeautiful work Tracy:)
Hugs, Heidi:)
OMG what a fabulous project. Charming, beautiful design and extraordinary details. Thanks for joining us at Delightful Challenges. We look forward to seeing you again.
ReplyDeleteHugs
Berni, DT
delightfulsketches.
This is a great project! Thank you for joining us at Little Red Wagon this week!
ReplyDeleteJoanne xo
What a fun idea!! I love all the papers you've used and the super cute image on the front!! Will have to give this project a try sometime :)
ReplyDelete<3 Emily L.
GF!
ReplyDeleteWow I just love your project and the tutorial. Awesome!! I have to try this one.
Hugz
Kim
WOW, how gorgeous is this? Already loved the front of your planner but I am deeply impressed now by seeing what it keeps inside! So, you must be perfectly organised now! LOL
ReplyDeleteHugs, Anja
You're amazeballs...this is UNBELIEVABLY wonderful. (Insert visual of me skipping and jumping up and down!)
ReplyDelete