Jen has had this displayed at her store for a while , but I'm ready to do a little spring decorating, so I brought it home. I'll have to make her something else to put out.
Anyway, it's a really simple project. The back panels are made of coordinating paper by Bazzill. I was in a "new techniques" phase so I tried something I'd learned on each panel. Let's take a look and I'll tell you about them. You can click on the photos for close up full screen views.

Each dp panel was stitched around with my sewing machine before it was adhered to the back panel. The butterfly is glimmer misted. Like I said, I made this a while back so at that time Glimmer Mist was a "new" thing to me. The leaves were stamped and embossed, then inked in the resist embossing technique. The green flowers are Primas folded into quarters.
The cream and green flowers were made using a technique that simulates flocking. Basically you drag your paper repeatedly over the edge of something (I used my counter) until your paper starts to separate in half. You then peel the two halves apart and you have two pieces that have a rough fuzzy "flock-like" texture. I glimmer misted them and added some buttons. The leaves under the blue flower have been painted with crackle paint for texture.

The blue and brown flower was made by cutting out one of the images from the dp. I then cut slits in the center and ends of the petals and wrapped the ribbon through the slits. The huge button are made from dp cutouts also. I punched out several layers of the backing cardstock and adhered them together to make a button. I didn't have my Cropadile at the time, so I punched the center holes with a regular hand punch and tied some twine through them. They're also covered with Glossy Accents. The bird image was cut out and then inked, stamped on, and glimmer misted.

The blue and brown flower was made by cutting out one of the images from the dp. I then cut slits in the center and ends of the petals and wrapped the ribbon through the slits. The huge button are made from dp cutouts also. I punched out several layers of the backing cardstock and adhered them together to make a button. I didn't have my Cropadile at the time, so I punched the center holes with a regular hand punch and tied some twine through them. They're also covered with Glossy Accents. The bird image was cut out and then inked, stamped on, and glimmer misted.

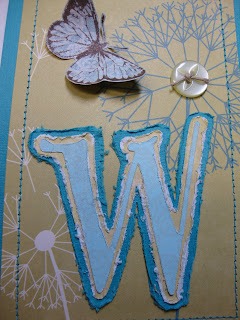
The letters were made using a technique I discovered on Teresa Manchas' blog (http://scrapthis-catz.blogspot.com/). She makes some of the most beautiful layouts and I love to scraplift her ideas. I cut the light blue center letters out with my Cricut. This technique works best with thicker cardstock. You basically take an Exacto knife and scrape it along the side of the letters to rough them up a bit. After you do this to the center letter, you adhere it to your next layer and cut around it with scissors. Then you repeat the rough up, adhere to the next layer, cut it out and rough its edges up. They are really neat looking. You can find her tutorial with photos on how to do this on her blog.
I'm working on a mini, but it's giving me fits. I'm supposed to be making it for my best friend's sister. She's not really a scrapper and into all the tags and pockets things, so I need to make hers more geared toward photo layouts (she LOVED her sister's Garden Mini), but I WANT to make all those tags and pockets. LOL So . . . I just may have to make two!
Have a great day!
Blessings,
Tracy


No comments:
Post a Comment