For this week's tutorial at
The Kraft Journal I'm going to show you how to make a cute little brag book/photo album. This would be a wonderful Mother's Day gift, especially if you load it with pictures!
The basic components of this projects are the
7 Gypsies Roma Book Covers and the
Kraft Blank Note Card envelopes from
Kraft Outlet. I chose the note card envies because they were the closest in size to the book covers.
I used four of the envelopes. They come ten in a pack and you can use as many as you like for your book. I traced around the flap of the envelope onto some copy paper. I then used my ruler to draw a line 1/8" inside of the tracing. I cut along that second line and had a template for cutting the designer paper to cover the envelope flaps.
Each envelope needs 1" trimmed off the bottom.
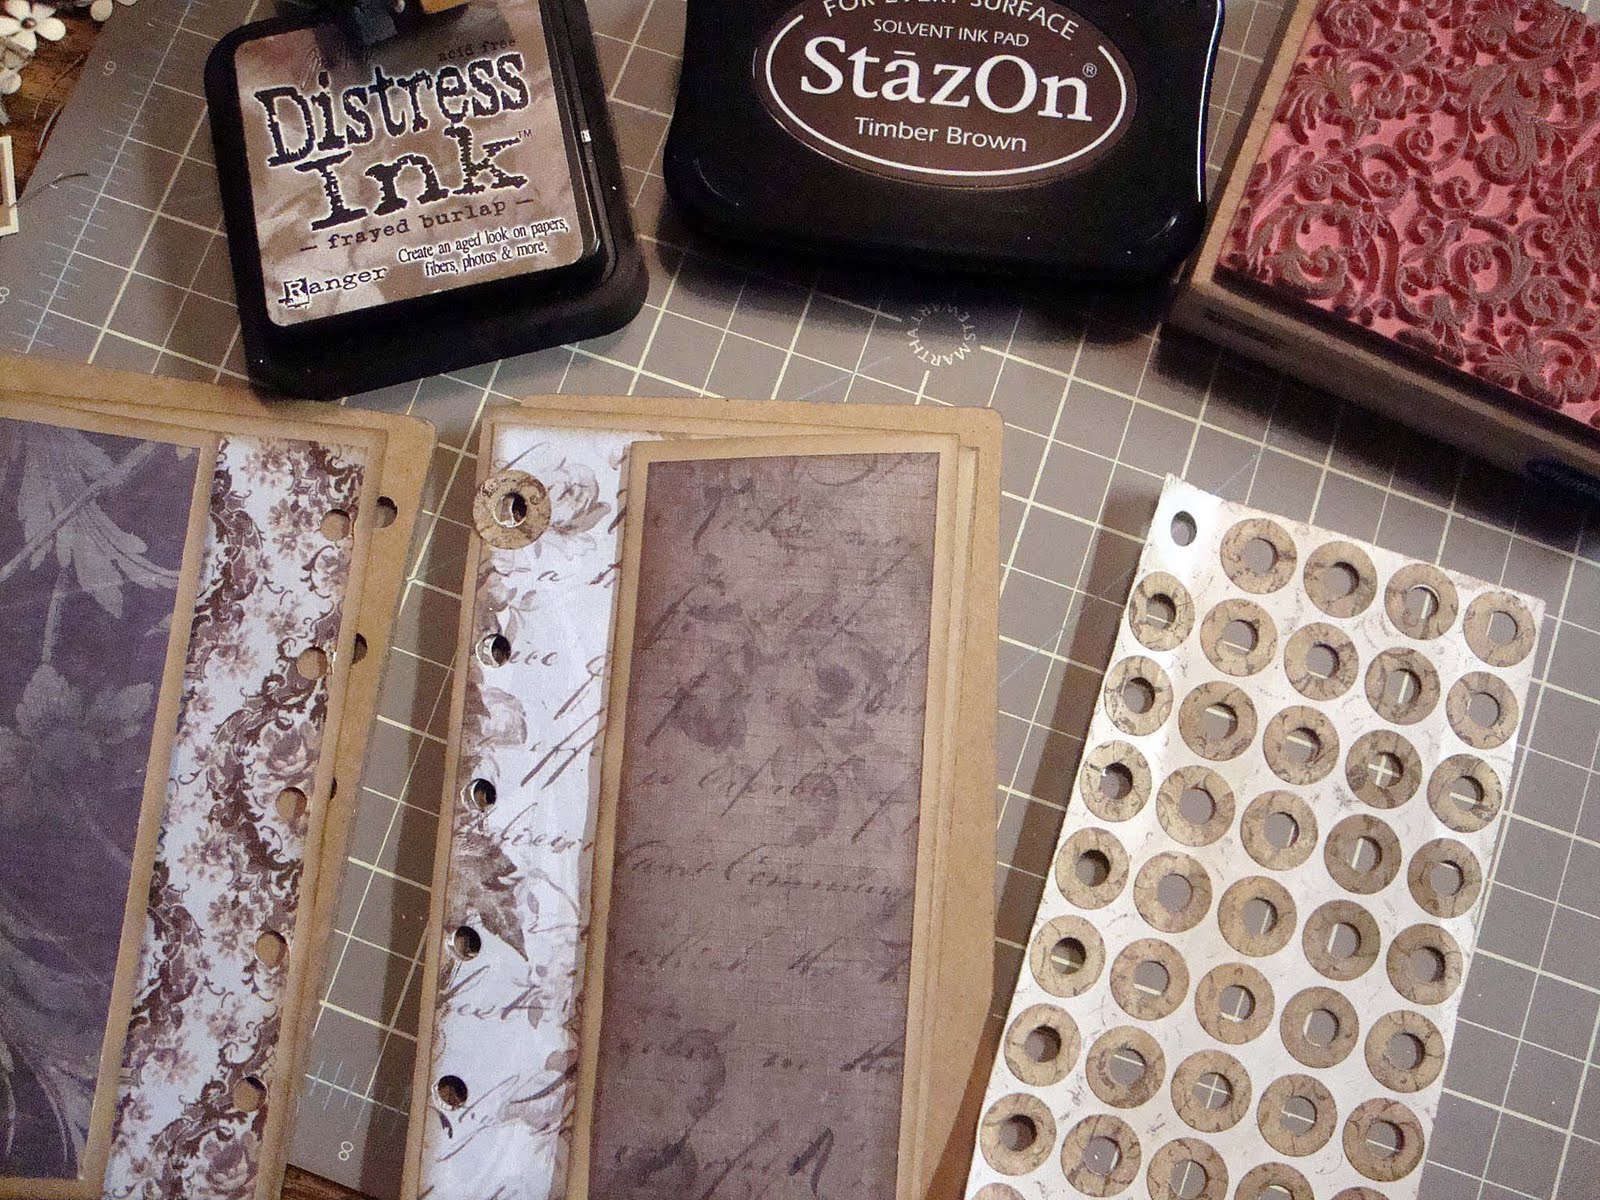
For each page you need two flaps and a solid panel (two if you want to cover the other side of the envelope) all cut from designer paper. I inked all the DP and the envelope edges with Distress ink. You'll also need a piece of paper for an envelope liner. I've used
Buff Ivory Cover Weight cardstock for mine.
This is what the pages will look like after you attach the DP.
NOTE: When gluing down your large panel make sure you only add glue to the envelope surface. You don't want to glue you pocket shut. I used a large circle punch to make a pull out slot so I can get ahold of the pictures in the pockets. You just need a large enought piece of paper for the liner to cover the punched hole or you could skip the liner all together. Depends on the look you want.
Once you have all your pages covered it's time to punch the holes for binding. I used a Cinch, but you can do it with a regular hole punch and you can decide how many holes you want. Since the bottoms of the envelopes were cut off, they are open and really need a little adhesive to keep your photos from sliding down so far that they peek out through the punched holes. So add a little glue in between the punched holes on each page where you see the arrows in the picture.
For the binding, I decided to use some the the wonderful
Earthy Hemp cord that Babette recently added to the store. I used this for several reasons. I'm planning on keeping this in my purse and metal rings would just be too bulky. Also, if I decide to add more pages, it's easy to unlace and add more. I left a little extra cord when I tied it off just for this purpose. The easiest way I found to make sure you have enough give in your pages is to weave your cord in whatever pattern you choose (I ended up changing my pattern after I finished the book) then open the book in half and lay it flat. You can loosen the cording up a little to give it some play. You don't want it too tight or it won't open fully.
My wonderful friend, Jan, did this cool
tutorial over at
Papercraft Star for making you own customized hole reinforcements. I thought the pages might need a little extra help since that hemp was going to be rubbing back and forth. I inked the decals with the same Frayed Burlap Distress ink I'd used on the pages and then stamped them with a texture stamp and Stazon ink. I added them to all the holes on both sides of the pages.
I kept the embellishments pretty plain. I didn't want anything too bulky because it might make marks in the pictures. I left the covers and front and back pages plain and just stamped a little fancy corner on each page.
For the embellishments I used some more of the Buff ivory cardstock as well as some
Brown Kraft Cover Weight cardstock. You'll also see a
Scalloped Grungy Prim Tag and I used the
7 Gypsies ATC Label Rubber Stamp for the frames around the names.
This is really simple and those pages could be done in so many different ways. Hope you give it a try. Thanks for popping in!
 Kraft Outlet Supplies
7 Gypsies Roma Book Covers
Kraft Blank Note Cards
Earthy Hemp Cord
Brown kraft Cover Weight cardstock
Buff Ivory Cover Weight cardstock
Scalloped Grungy Prim Tag
7 Gypsies ATC Label Rubber Stamp
Other Supplies
Stamps: Recollections "Brackets and Corners", Fiskars Cloud9 Design "Simple Thoughts--Memories"
Ink: Stazon Timber Brown, Frayed Burlap Distress ink, Sakura Micron Pigment pen
Tools: EK Success Retro Flower punch, Martha Stewart Rose Leaf punch, Sizzix Sizzlits flourishes die, Spellbinders Timeless Heritage set, Nestabilities Labels Four (S4-190)
Miscellaneous: beads from my stash, hole reinforcements, Recollections brads
Kraft Outlet Supplies
7 Gypsies Roma Book Covers
Kraft Blank Note Cards
Earthy Hemp Cord
Brown kraft Cover Weight cardstock
Buff Ivory Cover Weight cardstock
Scalloped Grungy Prim Tag
7 Gypsies ATC Label Rubber Stamp
Other Supplies
Stamps: Recollections "Brackets and Corners", Fiskars Cloud9 Design "Simple Thoughts--Memories"
Ink: Stazon Timber Brown, Frayed Burlap Distress ink, Sakura Micron Pigment pen
Tools: EK Success Retro Flower punch, Martha Stewart Rose Leaf punch, Sizzix Sizzlits flourishes die, Spellbinders Timeless Heritage set, Nestabilities Labels Four (S4-190)
Miscellaneous: beads from my stash, hole reinforcements, Recollections brads


10 comments:
Tracy, this is stunning and SO BEAUTIFUL thanks for sharing :O)
Hugs, Jóna
Wow Tracy! It's fabulous! It would be so much fun to put together! I really love the covers you used and the binding method is wonderful! Thanks so much for the great tutorial! :o)
Wow! Love this! Looks so vintage!
This is stunning, Tracy! Absolutely love the elegant vintage look to this. Those book covers are just fantastic. Thanks so much for the awesome tutorial! :)
Wow Tracy,this is gorgeous!!!
Hugs Heidy
This is just beautiful and I love how simple you kept the supplies used. Definitely going to try this one! Thanks!
What a magnificent album Tracy, love each and every page of it and you're such a patient teacher, too! It looks stunning and how marvellous it would be to fill it up with old pictures!! Hugs, Ira
This is so amazing, Tracy! I love the cording you used and those book covers are incredible! Love it!
This is so super cool we need a video of how you put all this together thanks for always taking the time to be inspiring.
Gorgeous! Love your journals and your photo tutorial is excellent and a great reference!
Post a Comment