
Hi everyone! I've got a tutorial for you this week on how to make your own background paper using mulberry paper. Babette is now carrying this wonderful pack of Mulberry Paper in the Kraft Outlet store. It has several different colors in the pack, but for today we're going to use a sheet of the white.
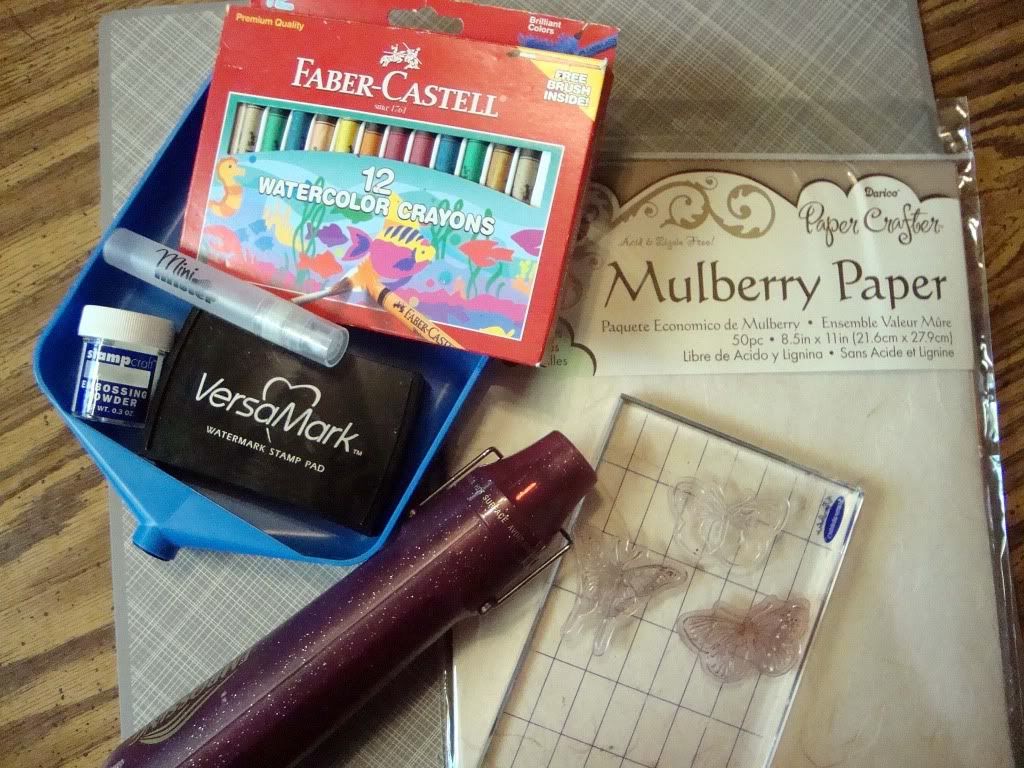
You'll need: mulberry paper, your choice of stamps for the background pattern, Versamark, clear embossing powder, a heat gun, a water mister, and your choice of colorant. For mine, I've chosen to use watercolor crayons. I've seen lots of variations on this and you can use alcohol inks and dyes also. I tried the alcohol ink and couldn't get the softness I wanted so I went with the crayons.
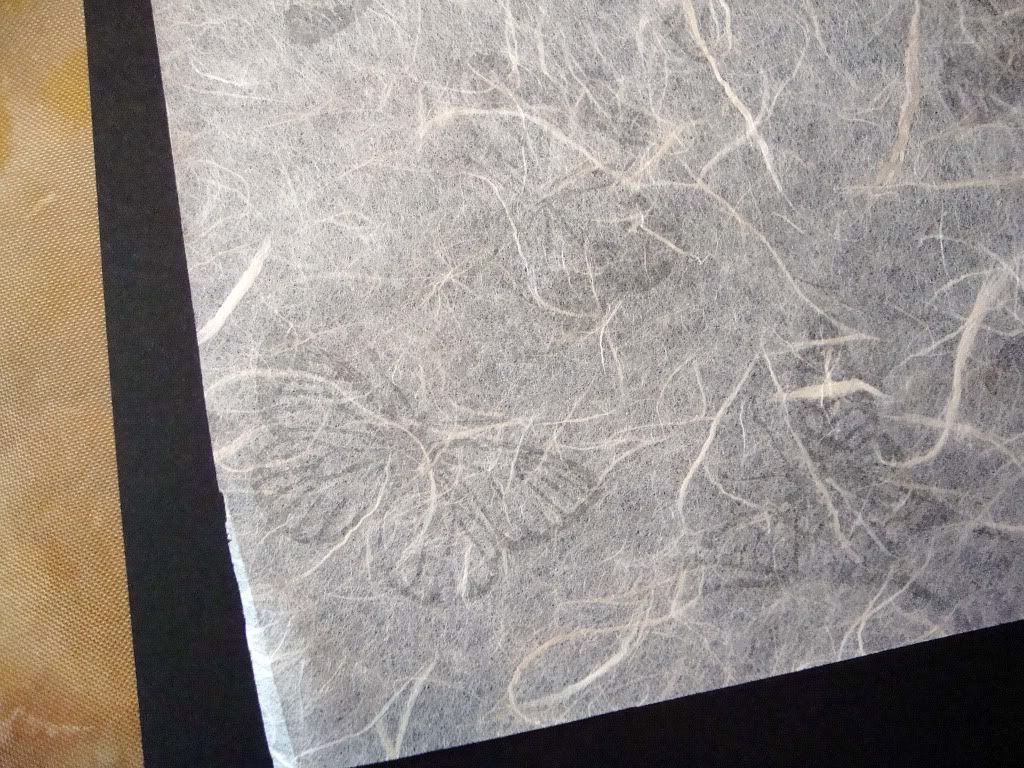
I cut a sheet of the mulberry paper in half and used Versamark to ink up some Martha Stewart butterfly clear stamps. I randomly stamped them all over the mulberry paper.
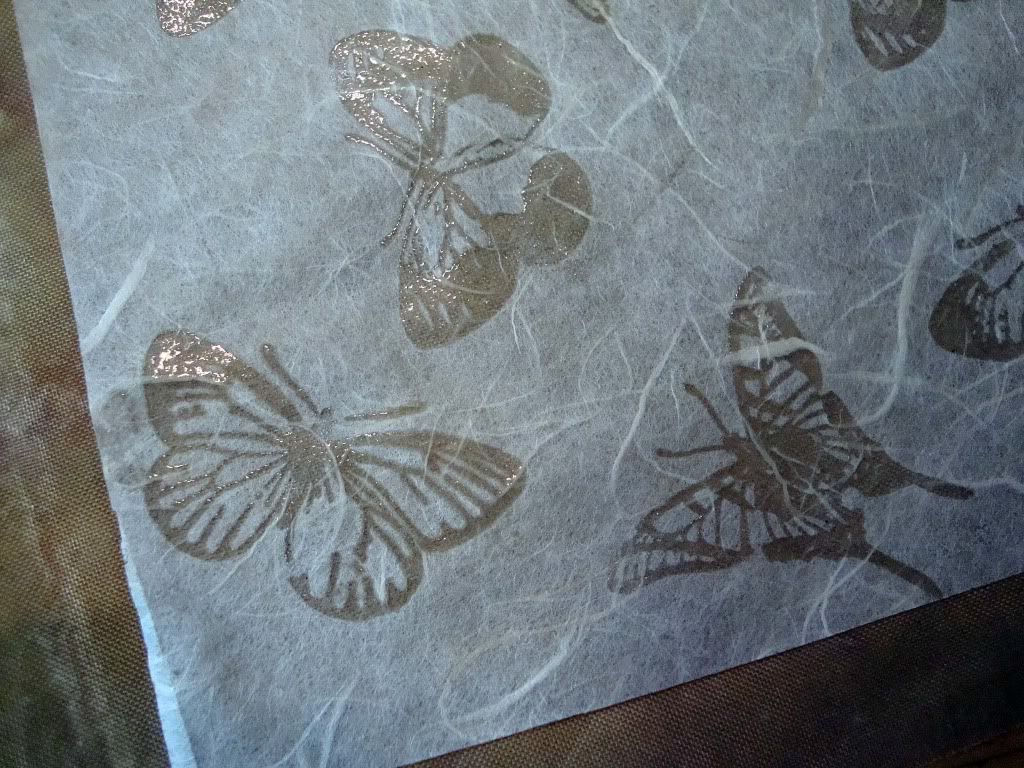
The next step is to sprinkle the clear embossing powder over the stamped images and heat with your heat gun.
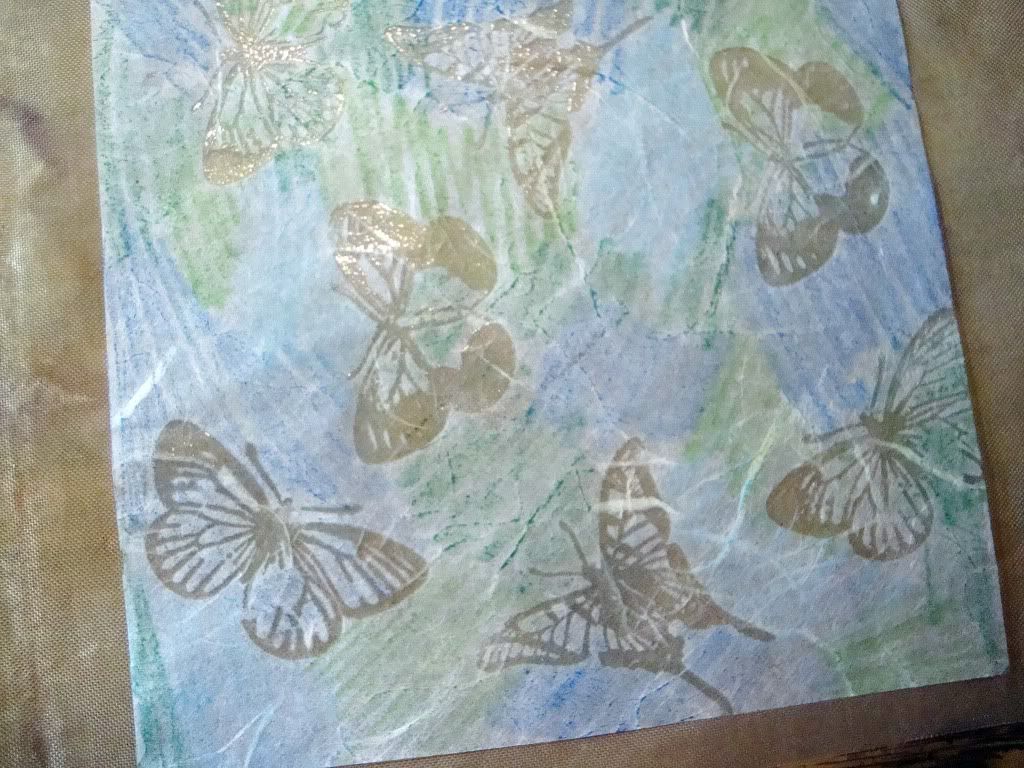
After your embossing has cooled, use your coloring medium. I chose two shades each of blue and green and randomly colored all over the mulberry paper.
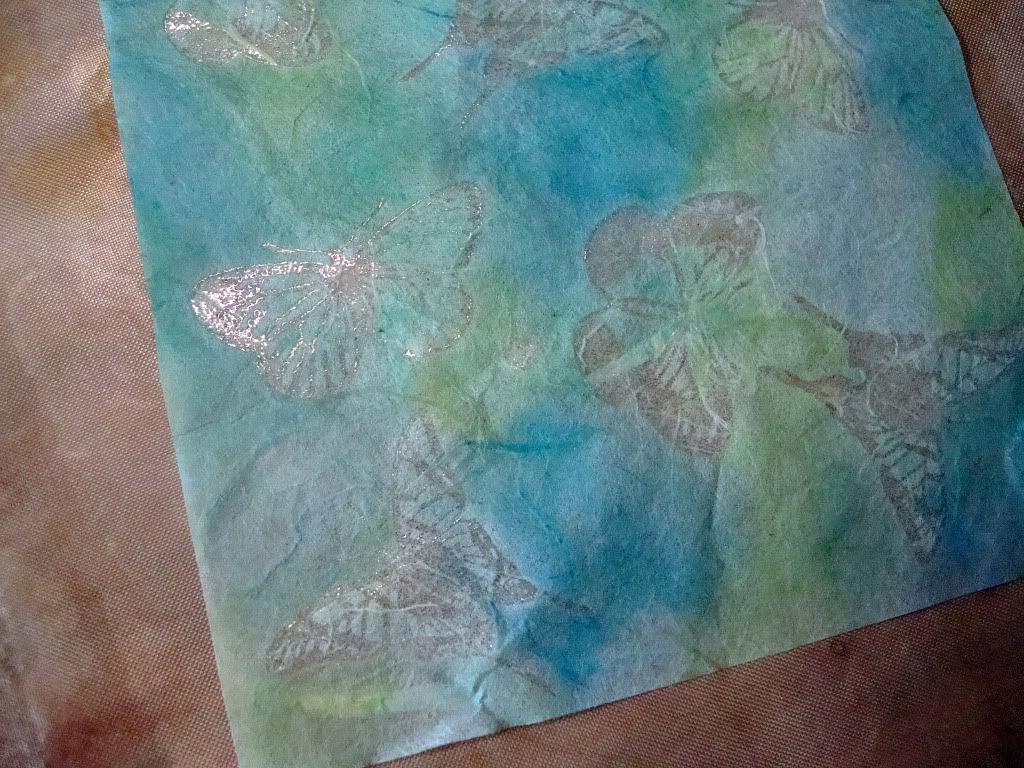
Next I generously misted the paper with water. The color starts to bleed, but I found that some light tapping with my fingers helped to get rid of all the harsh color lines. BE CAREFUL! The paper will tear if you're too rough.
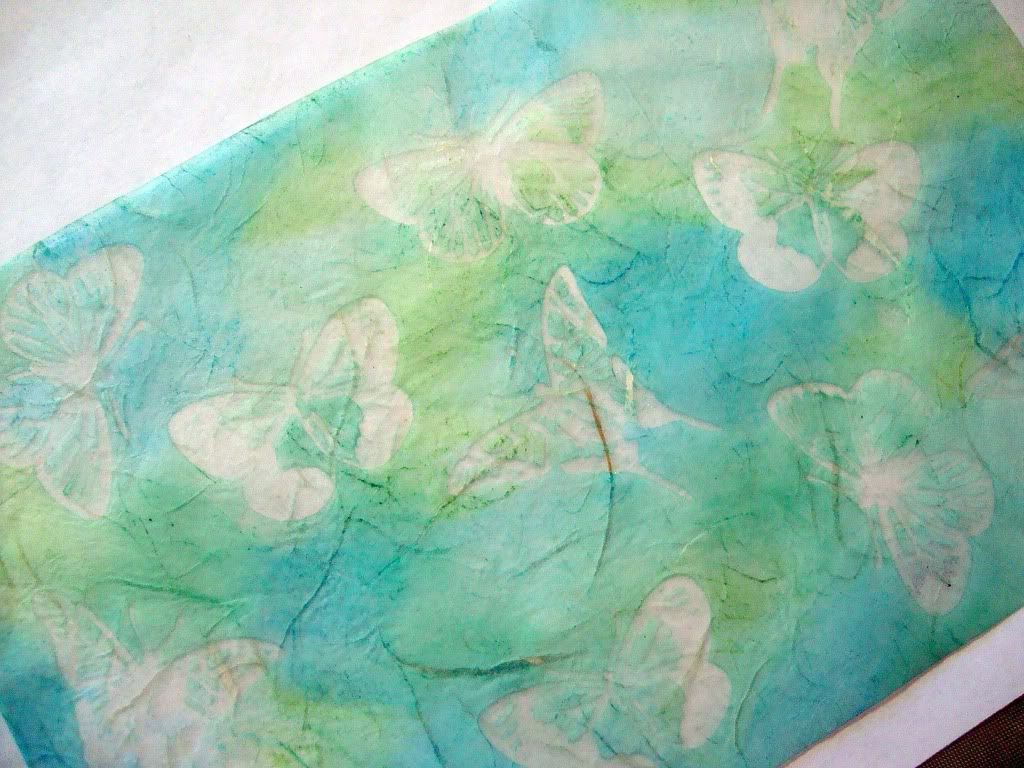
I dried the paper until is was almost completely dry with the heat gun. You then want to take two sheets of regular copy paper and sandwich the mulberry sheet in between. Using you household iron on a NON steam setting, iron over the sandwich. This step transfers the embossing from the mulberry to the copy paper leaving a clean image with no shine on the mulberry paper. You may have to go over areas a couple of times to get all the embossing to release so you can peel the mulberry paper off easily. You're left with the beautiful batik style pattern you see above.
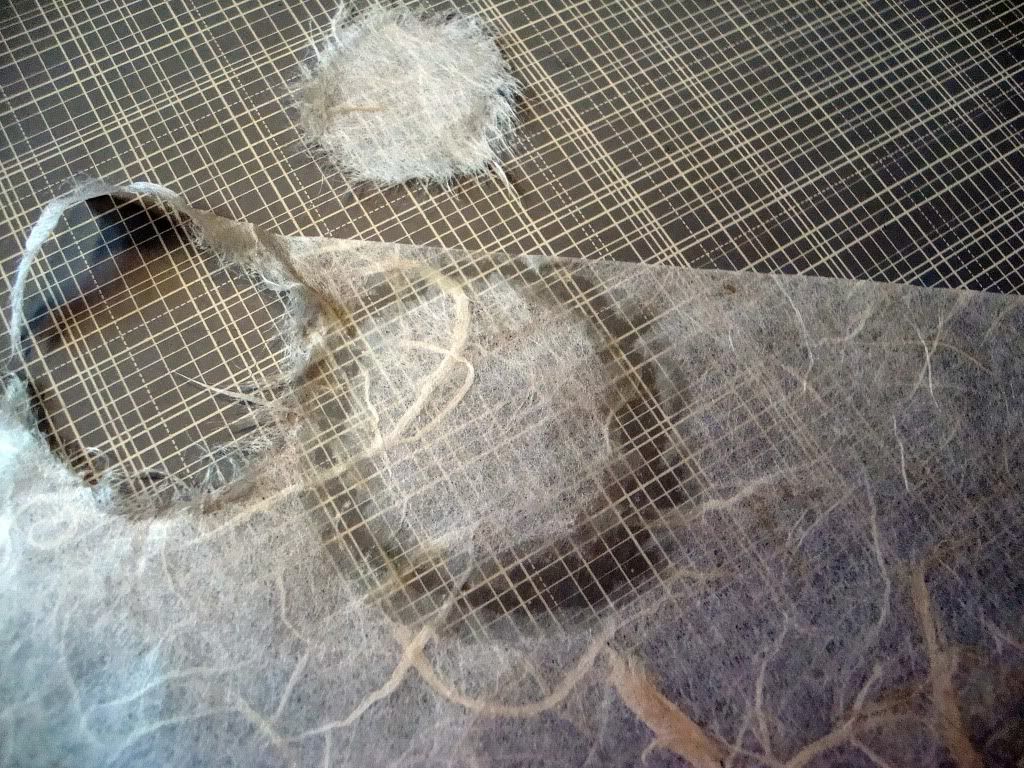
Mulberry paper is very easy to work with and will make fun "fuzzy" flowers. The rule of thumb with mulberry paper is that it is meant to be torn NOT cut. Use an aqua painter or wetted Q-tip to trace whatever shape you want and then gently tear, pulling outward. That leaves you with a nice fuzzy edge. I tore several circle sizes lollipop style to create the fun fuzzy flower on the card below.

Popping your batik print on top of white cardstock really helps the pattern pop out.
Hope you give mulberry paper a try. It's fun to work with!
Have a great week!

9 comments:
Beautiful creation, my compliments.
Many greetings hennie van hensmade.
Ooh...this looks like lots of fun! Your end result is GORGEOUS!! Thanks so much for the great tutorial! :o)
Thanks, Tracy... I'll give this a try. Love the flower!!!
This is beautiful. I really want to try this.. It looks like it would be fun. Your tutorial was great.. Now I just got to get me some of that Mulberry paper..
Hope you have an awesome day!!
Hugs, Linda
This absolutely rocks, Tracy! Love, love how you've used the mulberry paper here. Thanks so much for sharing this awesome process and for inspiring us to break out the mulberry and stamps. :)
Very cool technique Tracy! Love it. The look of the paper with the butterflies is just gorgeous! Thanks for the inspiration!
Amazing technique Tracy, love the outcome!! It IS actually like batik! I'm in love with your gorgeous flower, too!! Hugs, Ira
Beautiful and soft effect.
Beautiful idea!! It's really wonderful the final effect, I've falled in love with this tecnique from the first moment I saw it. My compliments fro the card too, and thank you for this brilliant tutorial.
Hugs,
Elena
Post a Comment